|
|
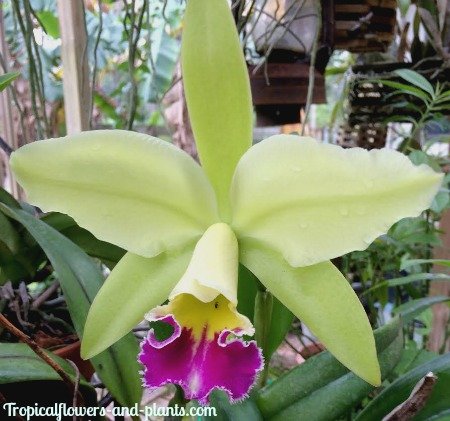
Cattleya
Orchid
Cattleya orchids are one of the most popular orchids in the trade. You may also hear people refer to them as the Queen of Orchids. This species has countless of different kinds that you can grow! From fragrant blooms to blooms of multi colors that will last anywhere from 4-6 weeks or more. This orchid would be a great addition to any collection. I would know, I have several........They are considered epiphytes due to their natural growth in the wild. Proper care can allow this orchid to grow within your home or outside your home.
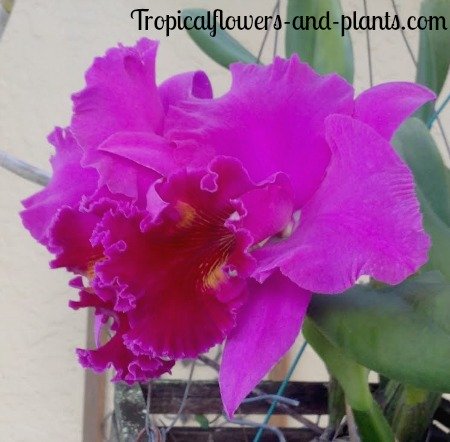
The Cattleya’s blooms come in a variety of sizes, from tiny blooms to super large blooms. My favorite part about the flower is that certain ones contain a pleasant aroma. Once the flower has expired remove the stem at the point where it had emerged from the leaf. Cattleya orchids have short thick leaves and steams that are segmented.These orchids have developed water-storage structures, which are known as pseudobulbs.
This is a general overview on how to care for your Cattleya orchid. There is a vast variety to pick from so before purchasing your orchid make sure to ask questions on that specific one. The needs may fluctuate slightly.
Light
Out of all the resources that Cattleya orchids need light may be the most important one. Cattleya's need bright light to some sun to continue the growth and flowering of the tropical plant. Remember this species does not do well with direct sunlight, especially during the day when the sun is at its hottest. They can handle some direct sun as long as its weak sunlight, like in the morning or afternoons.
* Great outdoor locations to grow your Cattleya orchid would include: hanging underneath a tree, inside a covered patio or the overhang of your home.
* If you plan on keeping this tropical flower in your home the recommendation is a window that faces south or west.
Temperature
For mature Cattelya’s the suggested temps are a 15-20 degrees between days and nights. These orchids won’t mind the dip in night temperatures and can tolerate 95 degrees during the day.
For seedlings temps should be 5-10 degrees
Humidity
Orchids in general love humid climates, so it comes as no surprise that Cattelya orchids thrive with plenty of humidity. The humidity should be 50% or higher.
Planning on growing your Cattelya inside? You can mimic the humidity by placing your orchid on trays of gravel and making sure the tray is filled partially with water.....TIP: You never want the water level high enough that it submerges your orchids root system.
Watering
Typically you should wait for the orchid’s medium to dry out before your next watering session. How quickly this will happen will depend on several factors: what size the pot is, the orchid’s location (inside or outside), how root bound your orchid is and how much light it is receiving.
Watering your Cattleya orchid is going to depend on if your orchid is growing outside your house or inside. No matter where its location is make sure that you water the orchid thoroughly enough that the water will run from the bottom through the holes.
* Growing your Cattleya outside may require you to water them twice a week especially in the hotter months. You really want to make sure the orchid has more moisture. During the cooler months you may have to cut back on the watering to once a week.
* Growing your Cattleya inside typically requires a good thorough watering once a week. Sometimes I will spray my orchid in the middle of the week.
Fertilizer
Cattleya’s are active growers so fertilizer is an essential part of their growth and blooms. Use a balanced fertilizer during their active growth feeding once every 2-3 weeks. During dormant times fertilize once a month.
You may also apply fertilizer every watering session however you will need to dilute it. If you happen to pick this method once a month do a flushing with just water. This will help prevent accumulation of the fertilizers salts.
Repotting
The suggested time frame to repot a Cattleya is every two years. Here are some indications on when to repot your orchid:
1) The potting medium has begun to break down and the water drains poorly.
2) The roots or rhizome of the plant are protruding over the sides of the pot.
3) The roots of the orchid are
completely root bound
* How to repot your Orchid………..Pull the orchid out of its current pot. Remove any dead roots and potting mix. I like to cut most of the roots to encourage new root growth. Place your orchid in a larger pot than the current one. Make sure the pot isn’t too large. Add the potting mix and you may need to stabilize the orchid with the proper sticks and clips.
TIP: I like to wet my potting mix before adding it to the pot.
|
Notice the shriveled and brown roots. These are the ones you want to make sure you remove. |
 |
* Dividing your current orchid into smaller new ones……Take the orchid out of its current pot and remove any dead or potting mix. Gather a couple of the pseudobulbs (4 or more) and cut from the pseudobulbs all the way to the roots.
TIP: When you make the division you want to make sure you use clean clippers so no disease is spread. then place the orchid in its new pot with the potting mix.
Some of these product below will aid you in a smooth orchid transplant session.
Happy Planting!
|
I like to use clear pots when completing my transplanting for several reasons. 1) I can make sure the roots are growing properly 2) The sun reaches them easier than in a clay pot. You can always place the clear pot in a more fancy pot in the end! |
Check out more incredible photos on Cattleya orchids.


Book Nook
Looking for a new book to read? Check out some of my recommendations


New! Comments
Leave me any questions and comments in the box below.